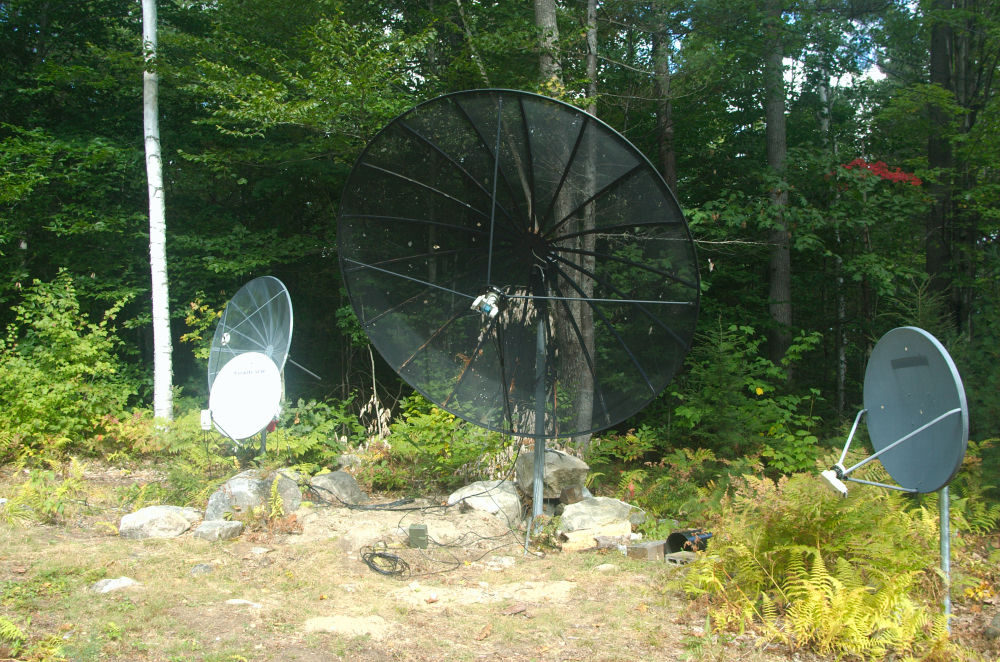
Removal of Orbitron dish, and installation of
SAMI dish.
After deciding to get a new SAMI dish to replace my Old Orbitron dish,
we also decided to move the pole before installing the new SAMI,
because the current position was right under an 18,000V power line,
which made me nervous, plus trees had grown up blocking the view from
that position. So we decided to pull the old pole out of the
ground. Since the original pole was planted with about 10 bags of
concrete, and the hole was dug between several BIG rocks, moving the
pole was not going to be easy.
Anyway, the total process, which has just
begun, consists of several stages, including (1) removal of the
Orbitron dish from the pole, (2) digging around the old pole to free
the concrete ball, (3) pulling the pole out, (4) digging a new hole,
(5) partially filling new hole with concrete, (6) putting pole/concrete
ball in new hole, and pouring more concrete around the pole, (7)
aligning the SAMI mount before installation on pole, and (8)
installation of the new SAMI dish on the pole. On day 1,
stages 1-3 were completed.
(1) Removal of the Orbitron dish from the
pole.
The first step was to untie wires from the pole, and loosen the bolts
at the top mount, so the dish could swing towards where my tractor has
access. I also (mistake) loosened the bolts that held the dish to
the mount (a pipe into a hub assembly), and I then loosened the
elevation bolts on the mount which allowed the dish to aim down low to
below the horizon, giving me access to the feedhorn for removal.
Dish looks really sad, however due to the above mentioned mistake, it
was almost even more sad. The dish pipe connection had slipped
out of it's hub, and ALMOST came completely out, crashing to the
ground. Only about a half inch of the end of the pipe was holding it
in.
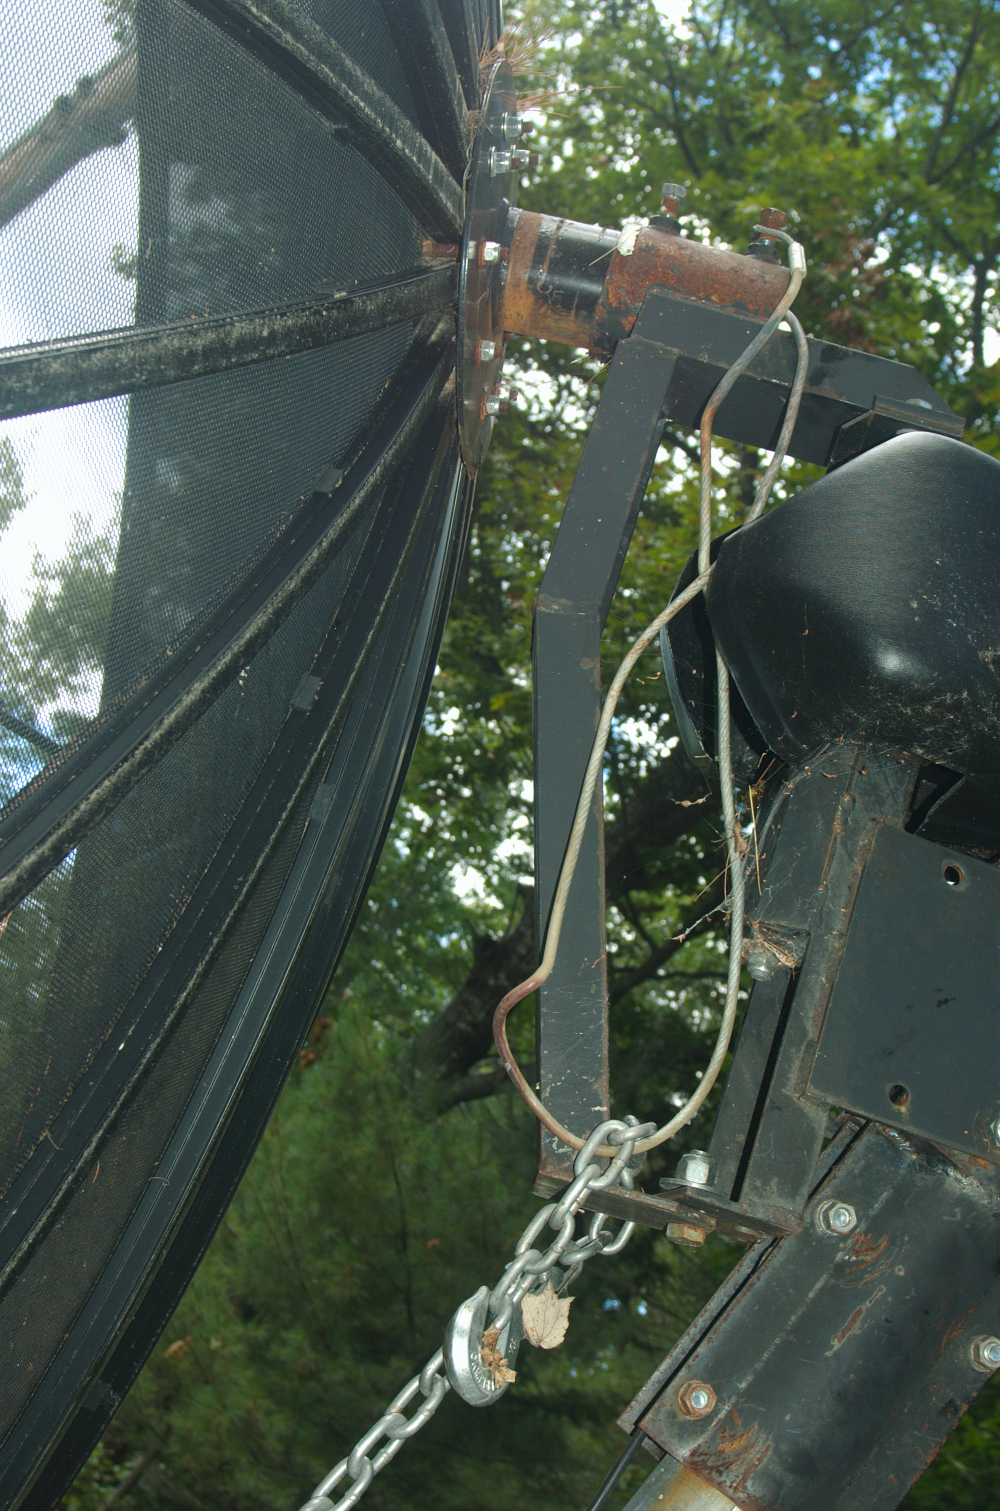
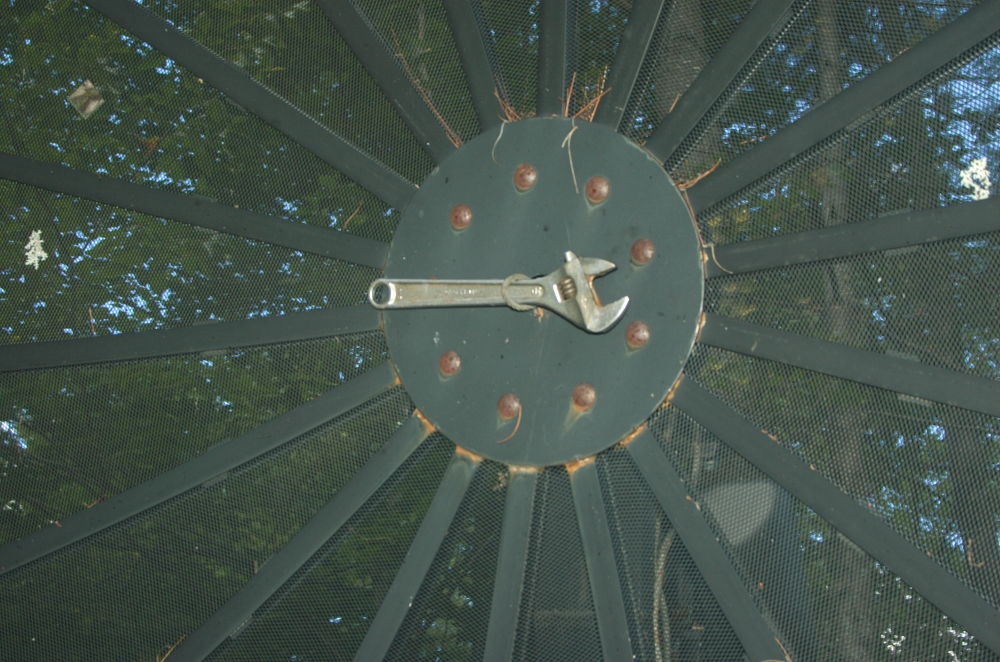
So I took an old bicycle cable, put it through the hole, anchored it to
the bolt on the hub, and as shown below put a wrench through the other
end. I figured that if the dish fell, this would keep it from
falling to the ground.
After securing the dish, I removed the feedhorn, and then brought my
tractor up to the dish, with a 2nd cable attached to the front end
loader, and I ran this cable through the hole and tied it to the mount
as well.
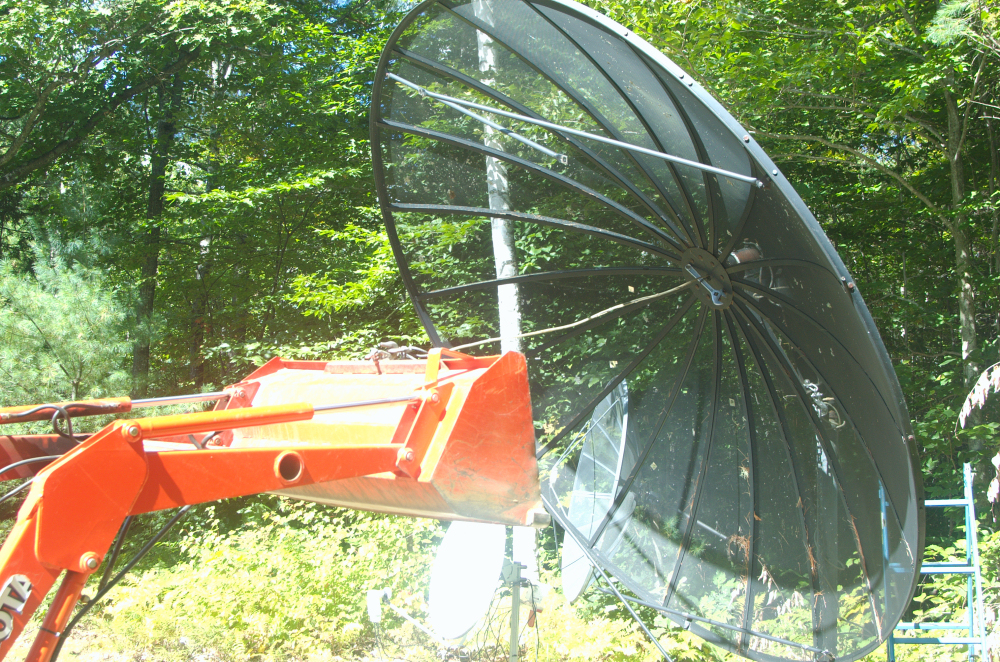
The plan here, was to gently push the dish off the hub, hoping that the
cable stretched between the mount and the tractor would catch the dish,
and the bicycle cable would only allow the dish to come down the 2nd
cable about 3'.
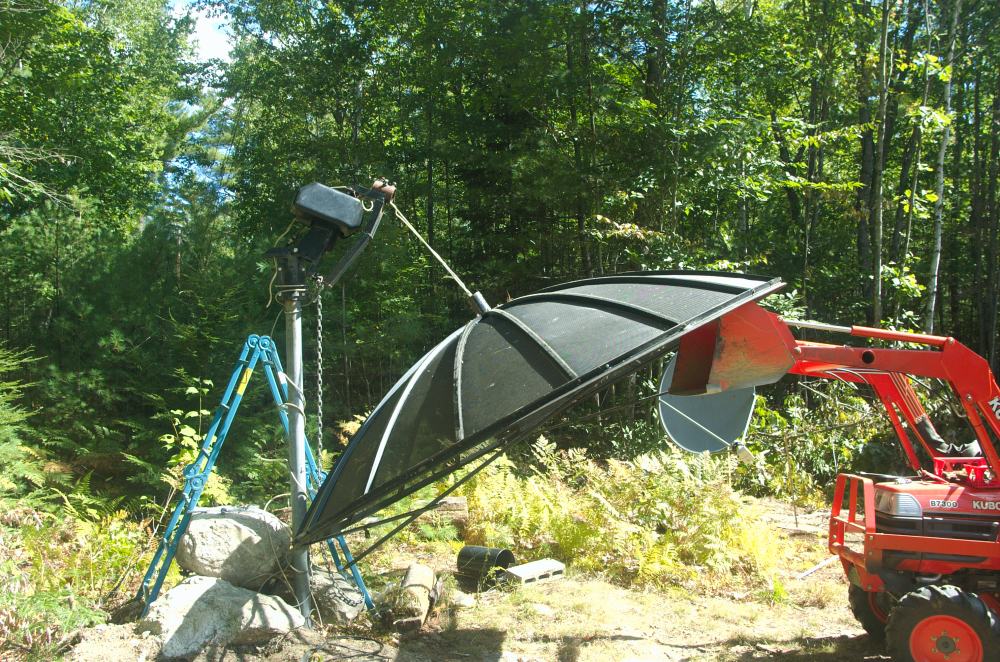
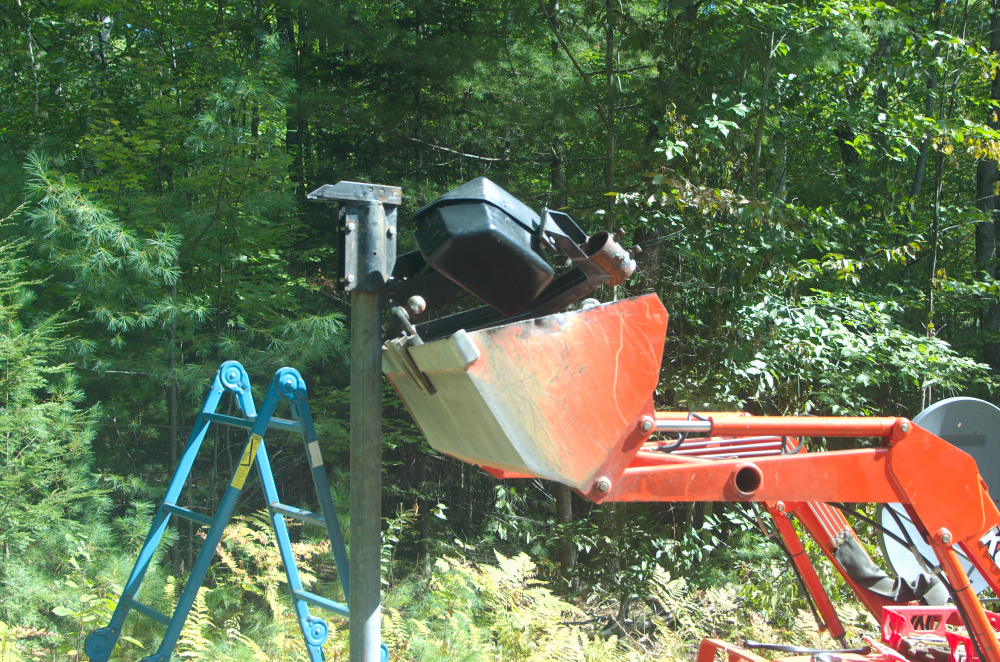
Above picture shows that it worked perfectly. Actually didn't even hit
the bucket, as I was holding the bottom of the dish, and gently let it
rest on the bucket after it was being supported.
Below, the next step was to slowly lower the bucket, allowing the dish
to lower down to the ground against the pole.
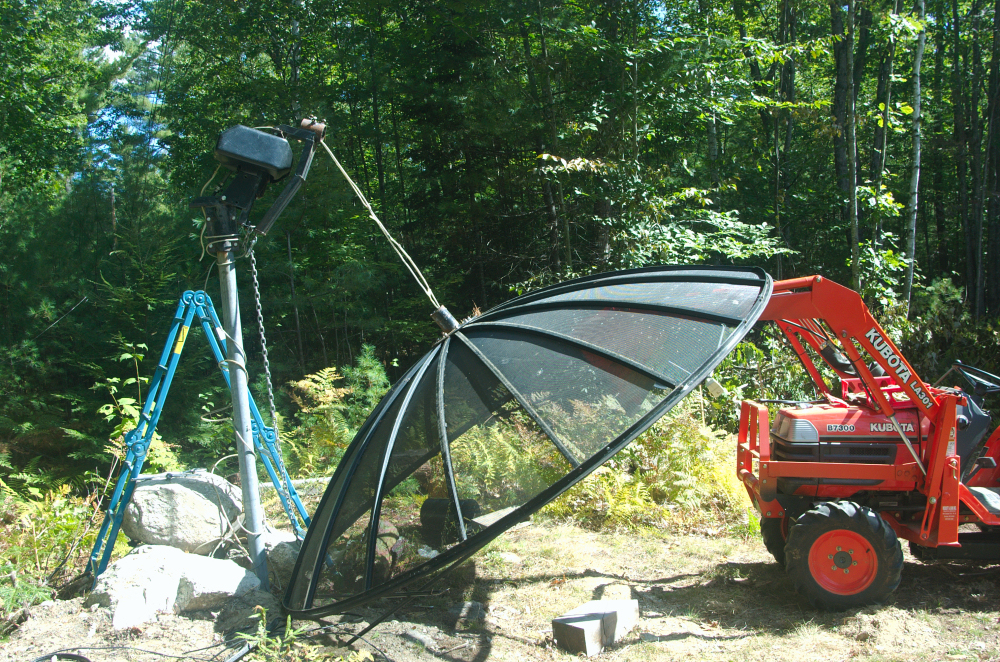
Again worked perfectly. At this point, the dish was being
supported by the bicycle cable, so I disconnected the longer cable from
the tractor, and pulled the tractor away.
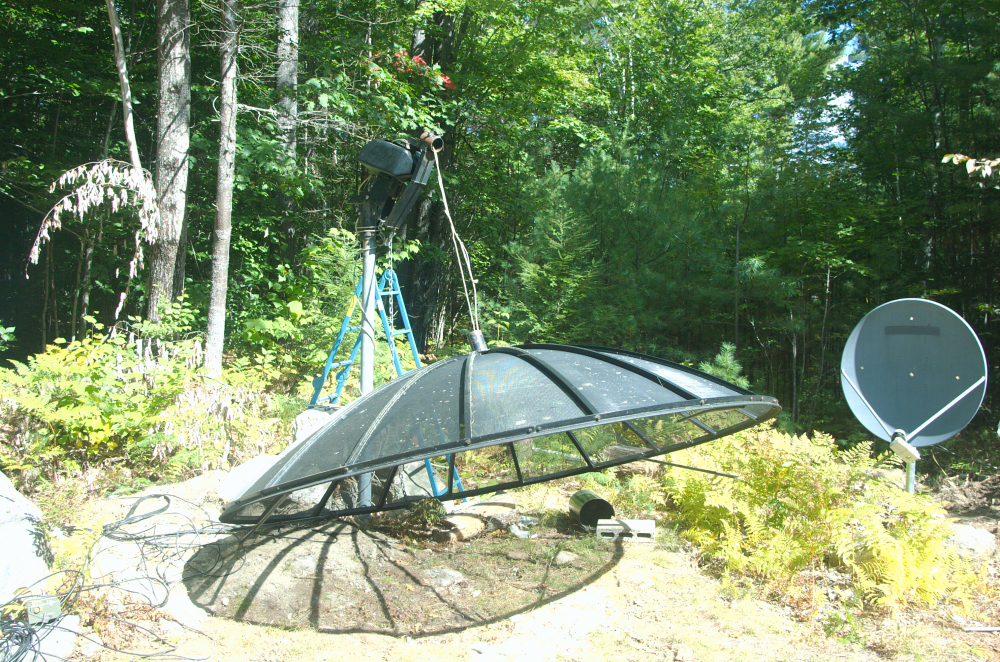
Now, the dish was being held up off the ground, so there was room to
move a trailer under it.
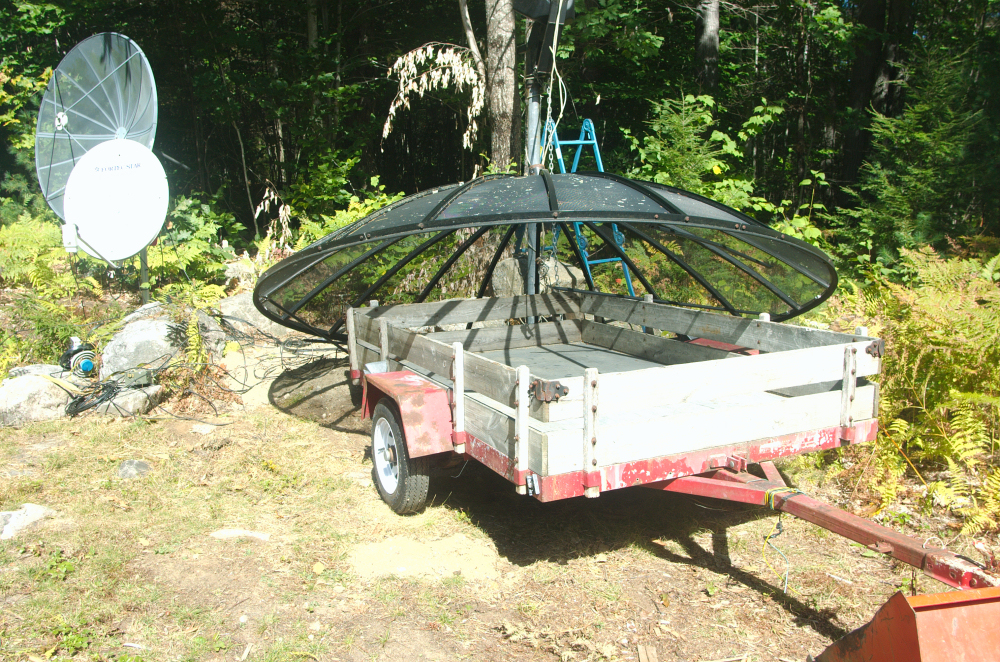
With the dish being supported by the cable, I then put some boards
across the trailer, and first lifted the back so that the front was on
the trailer, supporting the back with a step-ladder, then removed the
cable from the mount, and manuevered the dish onto the trailer.

I then pulled the trailer away, and brought the front end loader of the
tractor back to the pole.
Above shows the very heavy mount being loaded into the front end loader
for removal. Step one completed!
(2) Digging around the old pole to free
the concrete ball.
The first step was to remove the big rocks I had placed around the pole
to stand on when servicing the dish.
I just pushed those rocks away with the front end loader, then turned
the tractor around to use the backhoe to dig around the dish.
Once digging began, I ran into two BIG rocks that the pole was planted
between. The bigger on I pulled partly up with the backhoe.
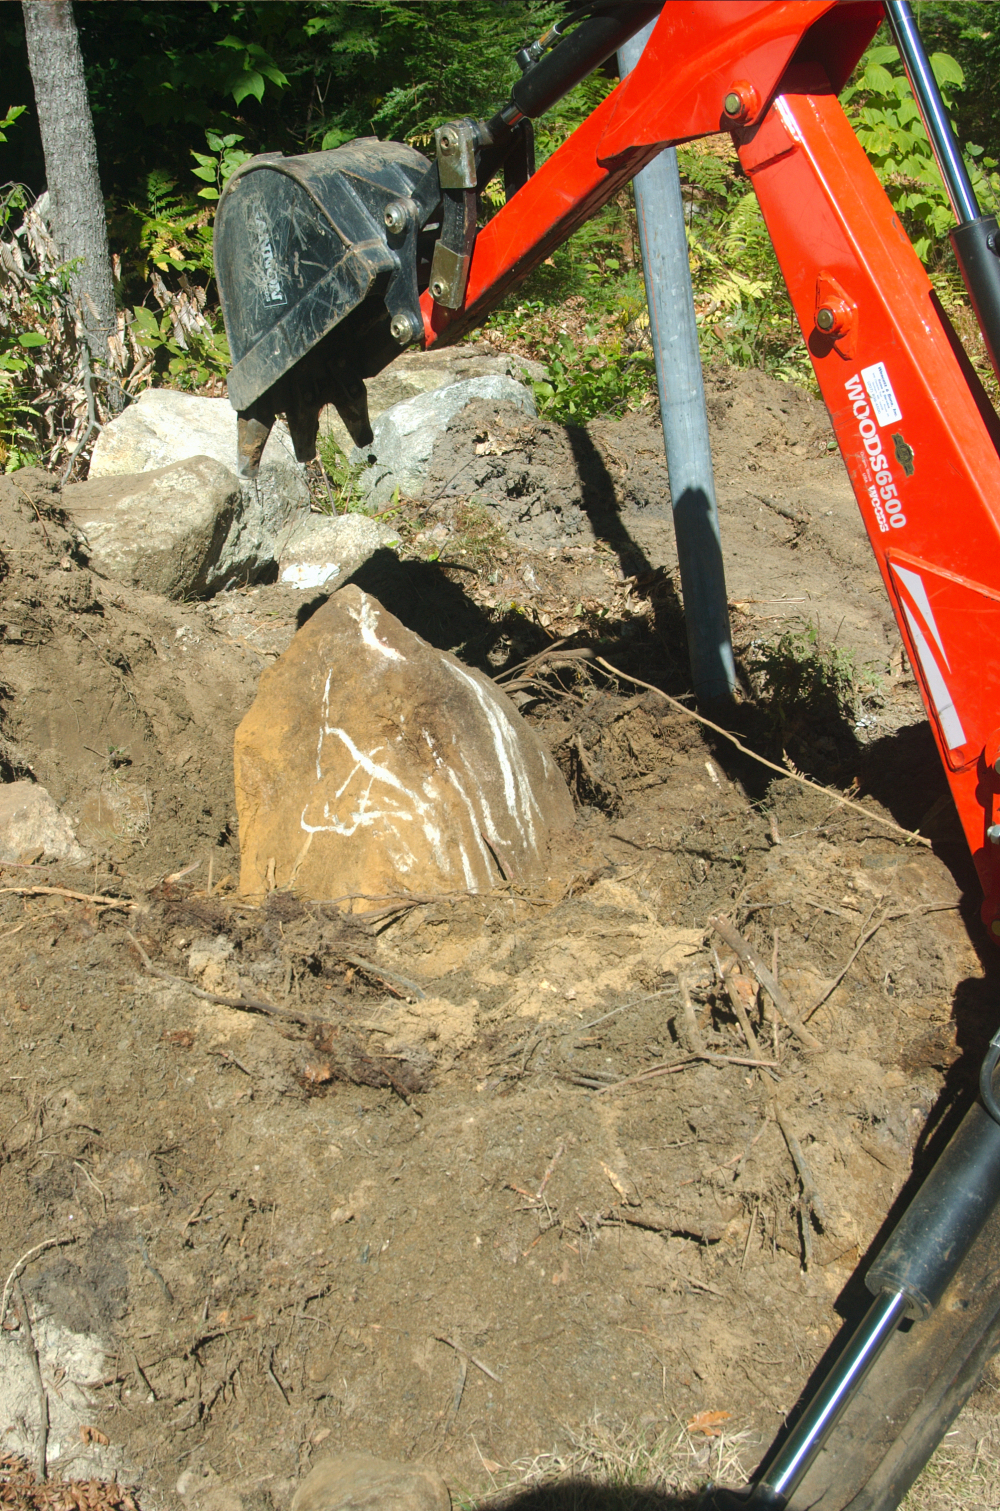
Then, I turned the tractor around, tied a chain to the rock and pulled
it out with the front end loader.
Then, I continued to dig, and exposed the top of the concrete ball that
the pole was planted into. With further digging, I eventually
managed to loosen it up a bit, THEN I turned the tractor around again,
tied a chain to the concrete ball, and tried to lift it out with the
front end loader.
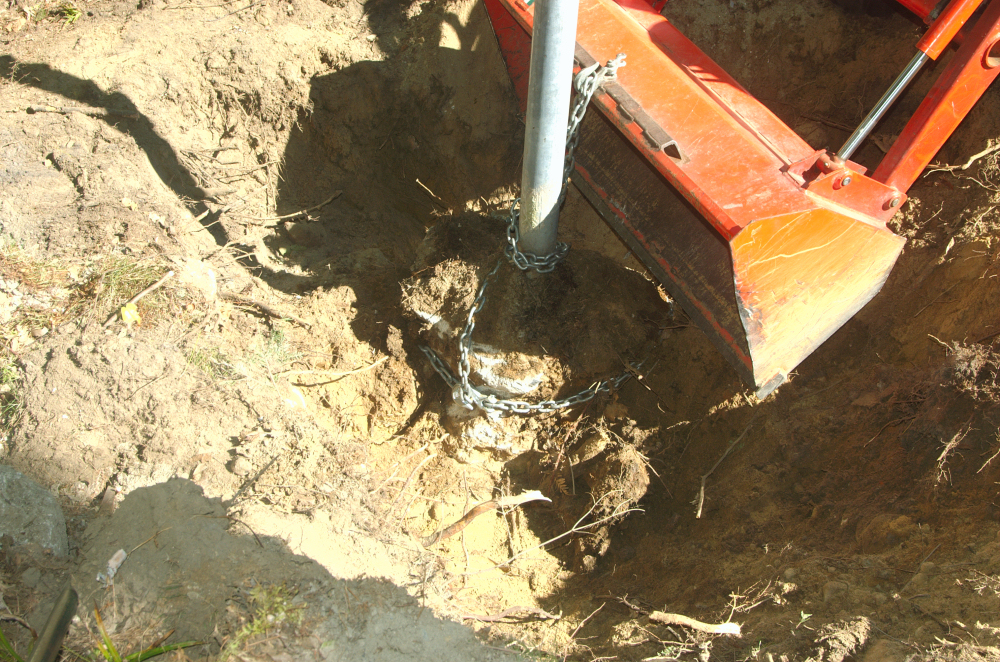
It wasn't easy to pull out, but eventually, I was able to pull the
pole, along with it's concrete ball out of the hole.
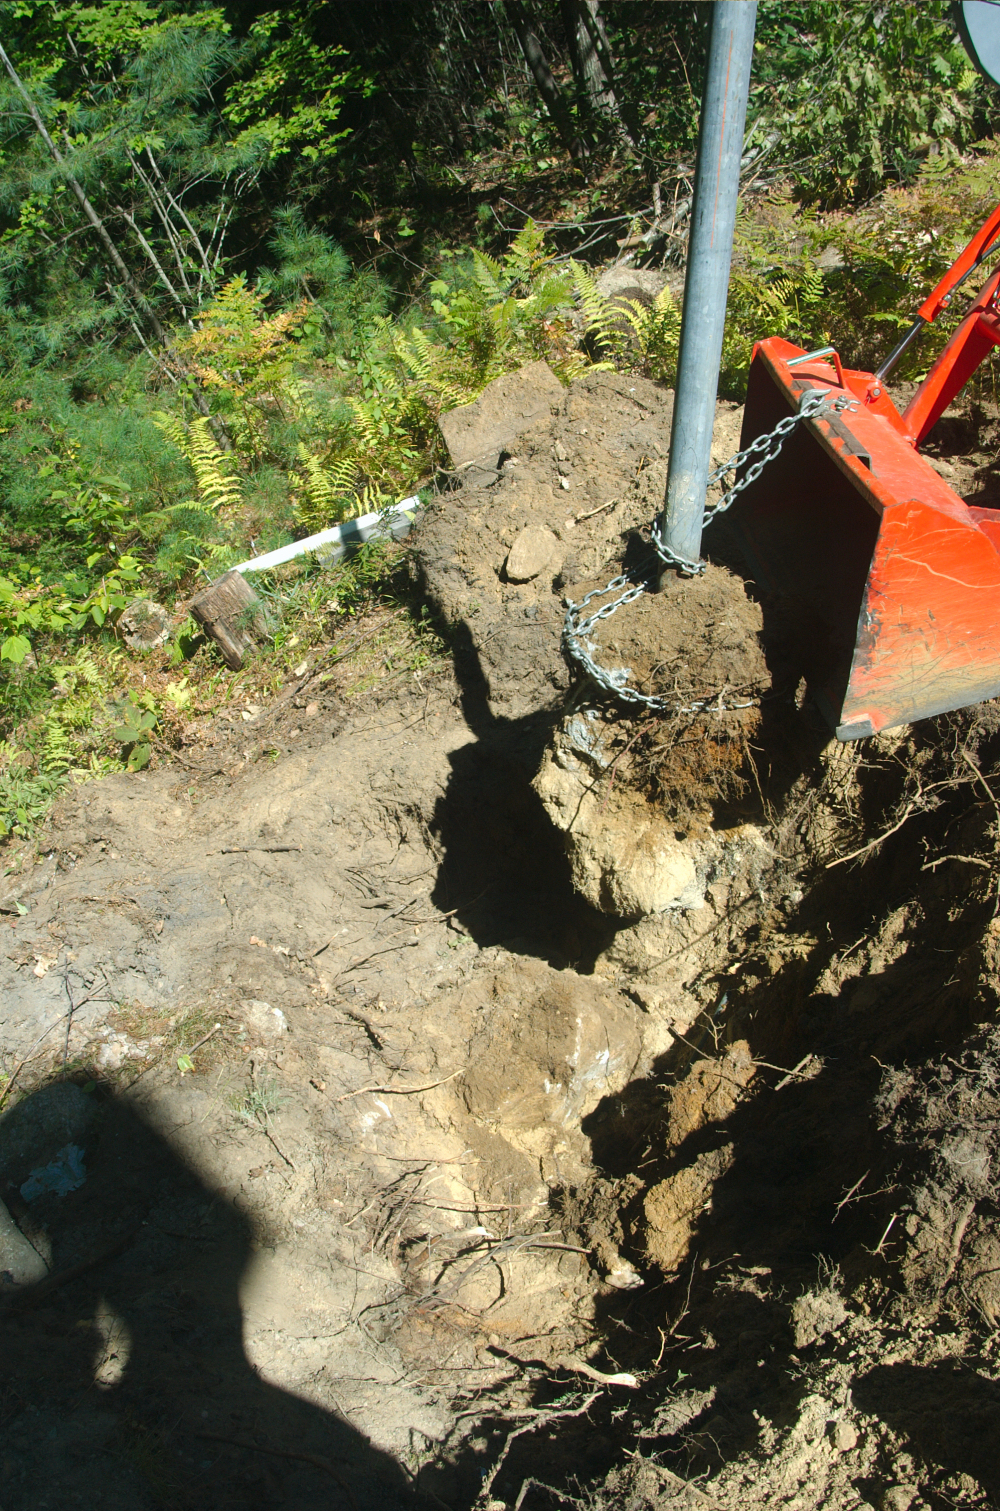
The concrete ball was really too heavy for me to lift with my somewhat
small tractor, but I was able to drag/lift at the same time to get it
out.
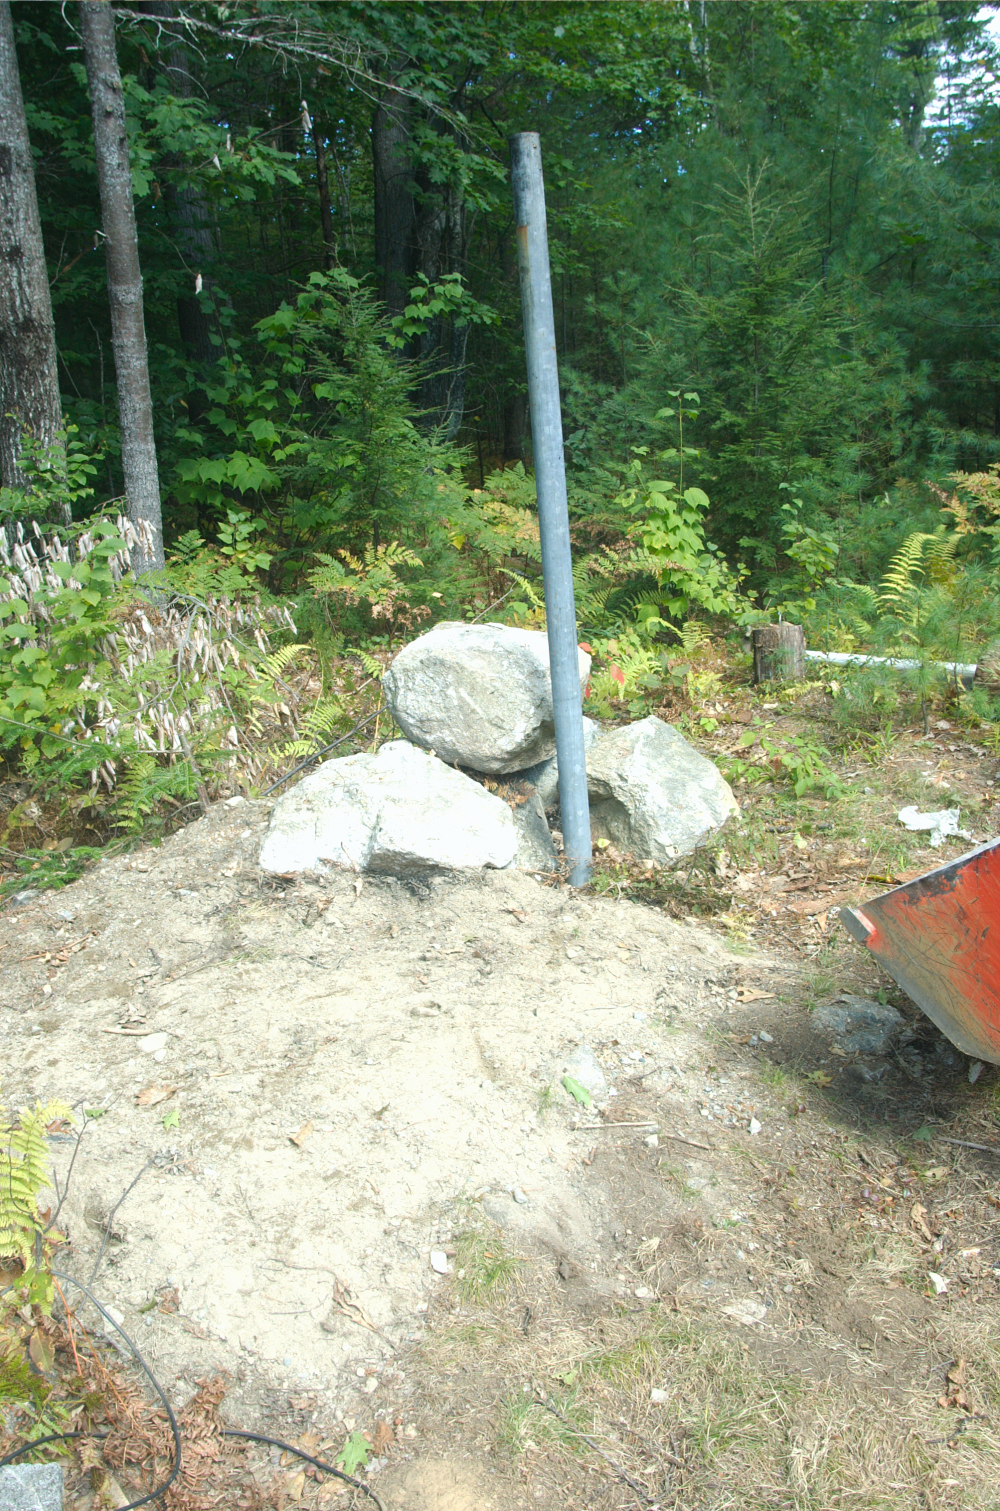
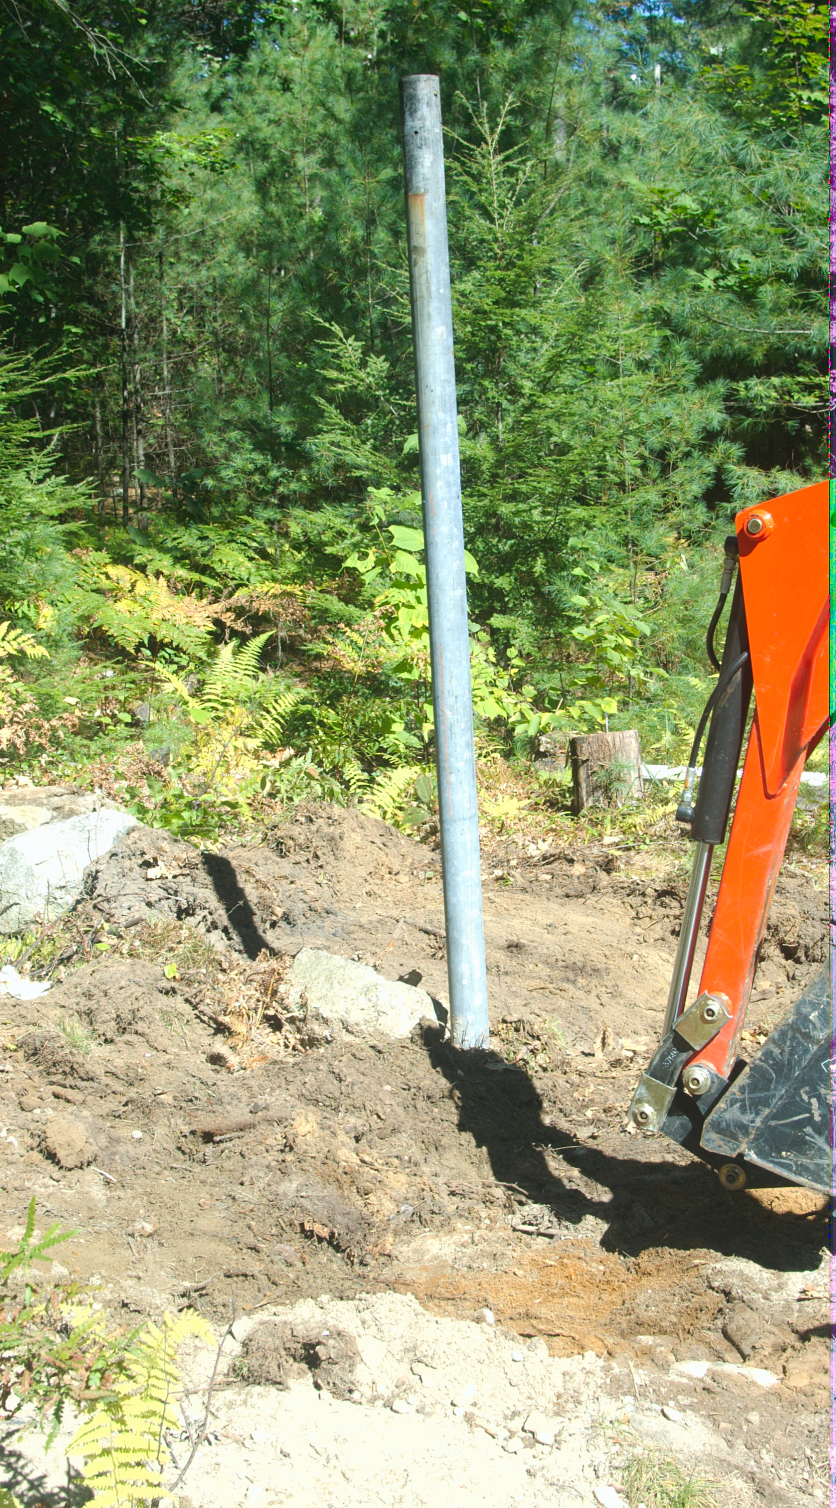
NOW, the next job is to dig the new hole, and plant the pole in
THAT hole.
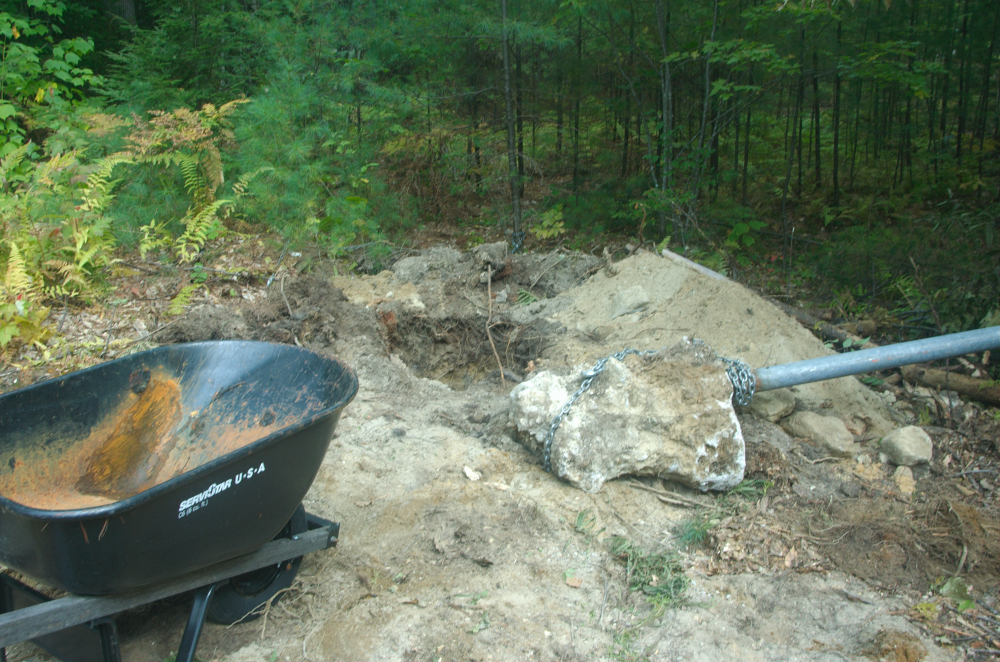
(3) Digging new hole, and planting the pole
in the new hole.
Well, I then dug the new hole with the backhoe (sorry, no
pictures). With the very small backhoe, I
tried to keep the hole as small as possible while big enough to get the
whole concrete ball from the old pole completely underground down below
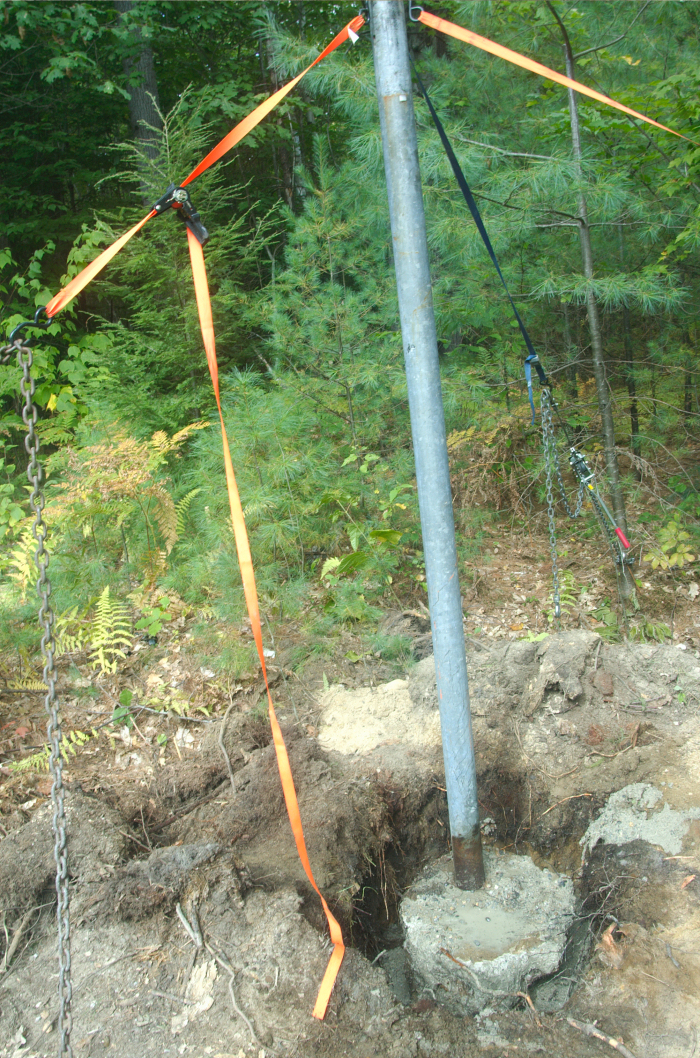
the frost line. Hole doesn't look like much, but is over 3' deep
relative to what the eventual ground level will be. After
digging the hole, I picked up the pole/concrete ball, and moved
it next to the hole so as to be convenient when the time came to drop
it into the hole. Then, I got a wheelbarrow ready, and started
mixing 80 pound bags of concrete, 2 bags at a time.
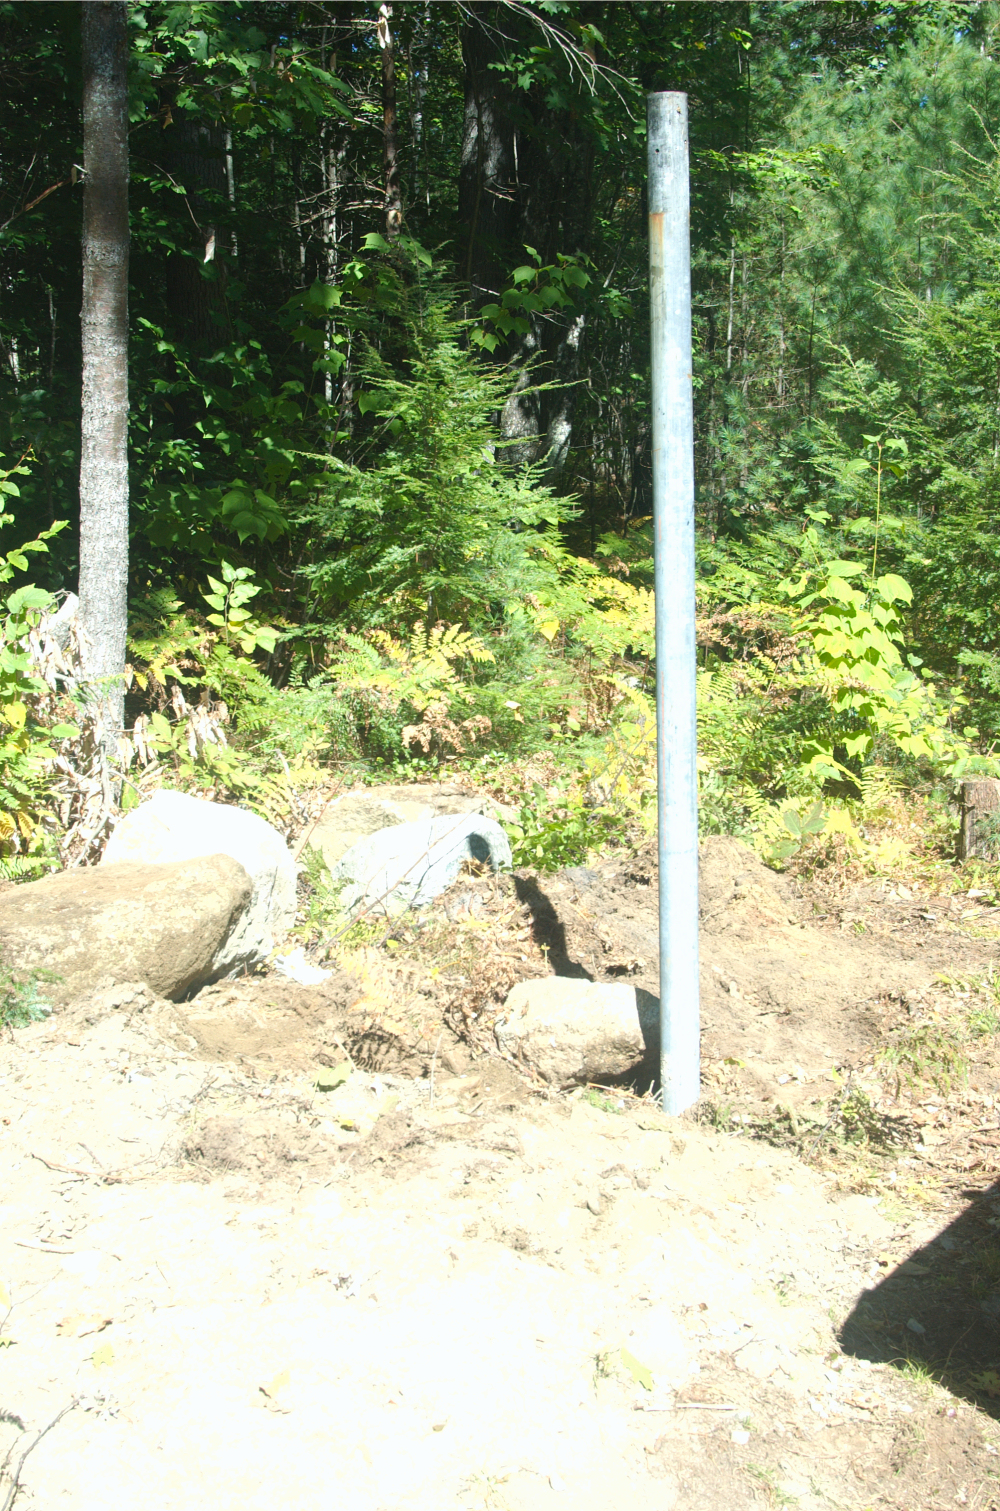
Once the first 2 bags of concrete were mixed, I poured that into the
hole so that the old concrete ball would rest on a fitted concrete
base. After pouring the concrete in, I brought in the front
end loader, lifted the old concrete ball, and DROPPED it into the
hole. After pushing on the pole to get it approximately vertical,
I tied chains/straps to 2 trees and a rock, and carefully tightened the
3 straps appropriately to get the pole perfectly level.
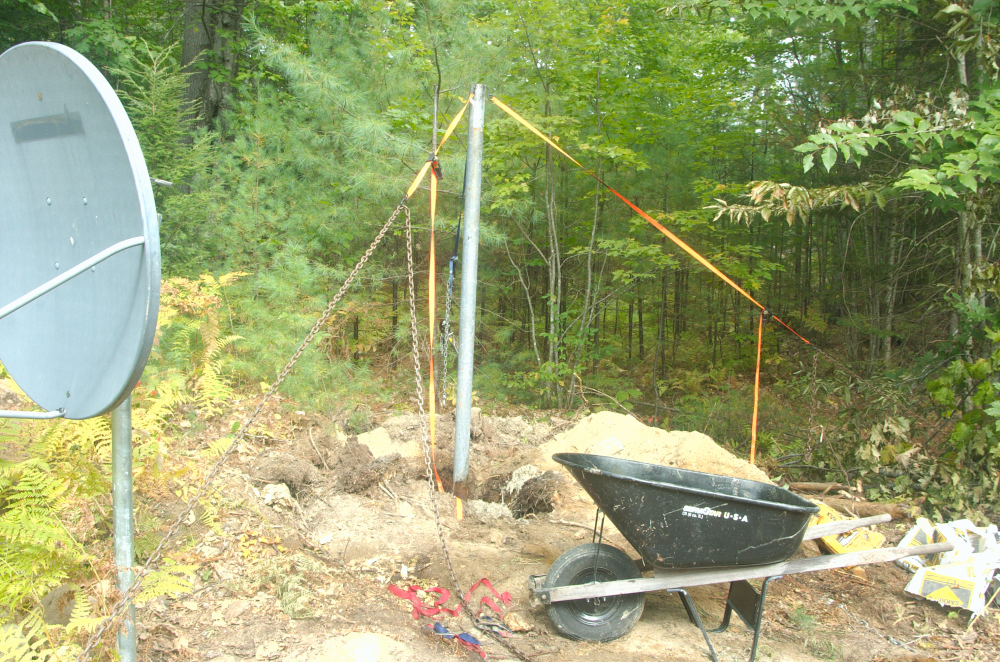
I then poured in 7 more 80 lb bags and one 40 lb bag of concrete, which
came about half way up on the old concrete ball, and provided a great
base wider at the bottom, for the pole.
For a description of the installation of the new SAMI dish on the pole,
click the link below:
(4) Installation of new SAMI dish.